Many proponents exist for adding the priming sugar to the whole batch at once and for good reason. It’s easy, and more or less fail safe.
A much less popular method, though one I use regularly, is known as bottle priming. This is the process of adding the priming sugar to each individual bottle one at a time, rather than all at once like when using a bottling bucket.
People tend to shy away from this as they feel it can lead to inconsistent results when bottling large batches. They do have a point as that can be a lot of bottles to keep track of. I like to bottle prime for one reason, it’s simple once you know how to do it and it gives me a great opportunity to experiment a bit.
In a normal 5 gallon batch I can get around 50 or so 12oz beers. So that gives me 50 chances to play around with the end result. I can play with the carbonation levels to see how a style will taste with more or less gas. I can use different sugar sources and change the resulting flavor.
Take for instance the Hoppy Hefeweizen I have brewing currently. On Saturday it will be in primary fermentation for two weeks. As part of a side experiment I have going on, where I am bottling 6 beers every week of fermentation for a month, I will be bottling an additional 6 this week with a black cherry syrup I was given as a gift as the priming sugar.
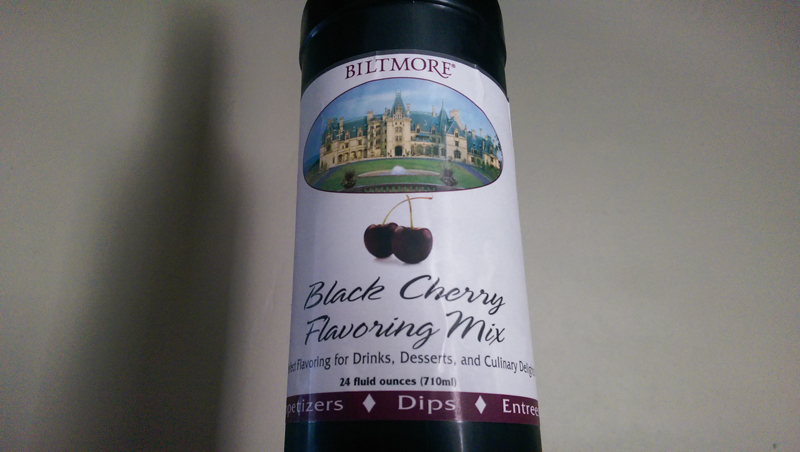
I have no idea how this will turn out but it is something I would never try with a whole batch. When we’re just talking a 6’er, no big deal.
Something more traditional would be the use of molasses or maple syrup. Using these as priming sugar rather than in fermentation will give off the desired aromas and flavors without so much of the negative off flavors found when used as a primary sugar.
The amount of carbonation will also change the taste of your beer so priming by bottle is a great way to zero in on the exact amount of carbonation you want when perfecting a recipe.
How to Bottle Prime
The easiest way to bottle prime your home brew is to buy priming tabs. These tabs are fool proof. They come sealed in a sanitary pack so you just drop a few into each sanitized bottle, fill and cap. The directions will give you the suggested amount for a medium carbonated beer so you can just add or subtract to adjust your levels.
After tabs, a cheaper and very popular method is to just use table sugar. The old rule of thumb is 1/2 teaspoon of granulated sugar per 12oz bottle. This will provide a familiar level of carbonation for most American beer styles. The usual method is to level off a sanitized 1/2 teaspoon and dump into each bottle using a sanitized funnel.
One tablespoon of granulated sugar weighs ~12.5 grams. Three teaspoons go into a tablespoon and since 1/2 teaspoon gives an average carbonation per 12oz bottle of beer you can take that and figure roughly 2 grams of sucrose per 12oz of beer should provide decent carbonation. With that figure you can now branch out to all different types of sugars.
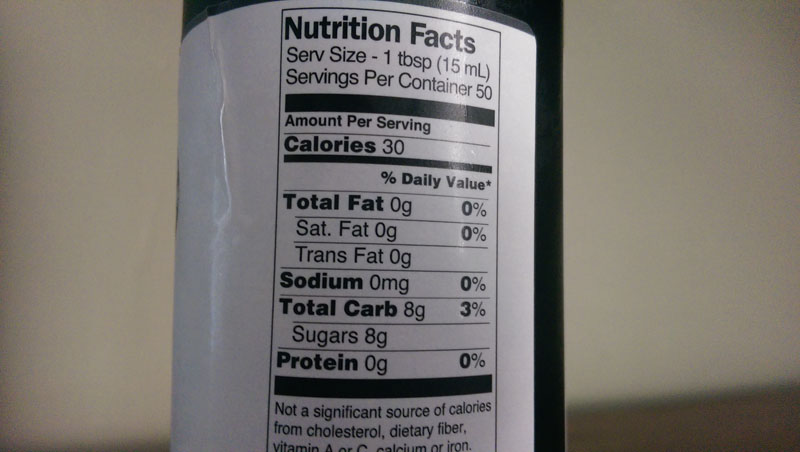
With my cherry syrup, taking a look at the nutrition label shows that 8 grams of cane sugar are in each tablespoon of syrup. This means that each teaspoon has ~2.6 grams which will be just about perfect for my hefeweizen as they are supposed to be on the bubbly side.
Most home brewers prefer dextrose because it leaves no taste behind but there is no reason to let such a great opportunity to adjust your beer go to waste. Experiment with different sugars and see what kind of changes they can make to your home brews.
Priming Sugar Suggestions
- DME
- Table Sugar
- Molasses
- Malt Syrup
- Blue Agave Nectar
- Pure Honey
- Sugar In The Raw
Don’t stop there, one of the best things about home brewing is getting the opportunity to try out beers nobody else would ever think to make but you. Get creative and try out something unique with your next brews priming sugar, if only a 6 packs worth.
As always, drop me a comment below to discuss or share your experience. Thanks.



Working on my first batch of mead. It is a day old and the aroma coming from the airlock is heavenly with the sweet smell of honey and alcohol. Unfortunately, I am limited by circumstances to a hot and fast fermentation. This sucker is bubbling away like crazy. I am concerned that if I even go to the recommended minimum of 3 weeks, my sugar will run out and undesirable secondary autolysis will occur. I also made the mistake of using 3x the recommended quantity of active dry yeast. I’m reserving judgment but I bet I will be bottling in 2 weeks.
I plan to bottle condition using 4 grams of cane sugar per 15.2 oz Grolsch bottle. I thought the best way would be to make a sterile syrup using a small amount of boiling water and then measuring using a syringe, place the correct amount in each bottle.
I’m doing it on the cheap and don’t have the equipment for racking or batch priming. Instead, I will be pouring directly from my fermentation vessel through a mesh coffee filter placed in a funnel into each bottle. It’s a good thing I’m pretty coordinated 😉
This amount of priming sugar should produce a carbonation level of 3.2. I really want more but I’m giving myself some room for error in case I misjudge the end of fermentation and it’s still going when I bottle it. I have no hydrometer.
“But they’re so cheap”, you must be thinking. Well, I have been in that “only a few dollars more” mindset my whole life and I’m trying to change that.
Technically, I could make and calibrate my own hydrometer but that’s a lot of work to make some quick mead. People made mead for at least 3700 years without them. I have access to modern sterilization procedures and even a fancy airlock. What could possibly go wrong 😛
Hey, I’d rather be brewing a nice stout. The objective was dirt cheap alcohol. I used some old, crystallized honey that was gonna just go to waste. I spent $12.50 in total to do my first batch, buying a carboy and airlock. If I went with the “only a few bucks more” mentality, I would quickly find myself spending more to make a beer than I could buy it in the store for.
When I first considered brewing 2 years ago, I was looking at about $600 in equipment to be able to make beer the way I wanted.
Maybe someday I can get into brewing as a hobby but for now it is merely a way to avoid having to cut alcohol entirely from my budget.
The fact is by making mead I’ll get double the alcohol for half the price of making the cheapest extract based beer and probably in about half the time. And I figure even the first time around, it’s likely to taste a lot better than cheap vodka and lemon lime soda.
A couple things I have to get to right away. Don’t use the coffee filter. This is going to oxygenate your beer. Not good. I wouldn’t worry about filtering your beer, the first few may be loaded with trub but it will clear out. If you are not gonna go to a secondary to bottle that is fine just bottle right out of the fermentation vessel over the yeast but don’t let it foam and go slowly. Have a system to make sure you don’t miss any bottles with the priming sugar or go too much.
As a new brewer you have to learn to rules before you start breaking them. Just general advice.
I also wouldn’t worry at all about autolysis. Your amount of yeast isn’t significant enough for that to be an issue, autolysis is a worry of the commercial brewers, as your first brew I would assume it is 5 gallons or less, not an issue I would concern myself with. Your issue is the heat! If your do not keep the temperature of the fermentation within the yeast range you will get fusel alcohol and off flavors from the stress the yeast are under. If you on’t care about taste, fine but the fusel will just give you a headache.
Actually, if it is already too late to get proper temperature, leaving it on the yeast for additional time may be the only thing that saves it. I would let it sit 6 weeks minimum starting from day one. Let your yeast improve it as much as possible. They eat more than just fermentable sugars.
Going no hydrometer is just fine. When the airlock stops bubbling you have hit final gravity (most likely) IF it never stops bubbling you have an infection. If you wait the six weeks I recommend for you because of the yeast stress it will certainly be ready. If you just want it ASAP be prepared to not like what you drink. If you are trying to save money, don’t start by wasting money.